How to Find the Best Photo Spots at Your Wedding Venue

through
Quick Navigation
- Why a Venue Photo Walkthrough Changes Everything
- The Best Indoor Photo Spots at Any Venue
- How to Match Your Photo Timeline to Your Venue's Light
- What Your Photographer Needs From You Before the Wedding
- Start With the Light — Every Photographer Does
- Outdoor Wedding Photo Locations You're Probably Missing
- Hidden Photo Spots That Make Galleries Special
The first thing I do when I arrive at a wedding venue isn't check the ceremony spot. It's not the reception setup. I walk the entire property with my camera, alone, usually about two hours before anyone needs me. I'm looking at where the light falls. Which walls bounce it. Where the shadows land. Every doorway, every window, every random corner that might become the best photo of the day.
After 200+ weddings, I can tell you this with certainty: the couples who get the best galleries aren't the ones with the prettiest venues. They're the ones who knew where to stand.
Finding the best photo spots at your wedding venue isn't something most couples think about during a venue tour. You're checking capacity, counting bathrooms, asking about noise ordinances. But that walkthrough is your single best opportunity to discover spots your photographer will love — and to avoid the ones that look great to the eye but fall apart on camera.
This is the guide I wish every couple had before their venue visit. Room by room, inside and out, here's how to scout your wedding venue for photos the way I would.
Why a Venue Photo Walkthrough Changes Everything
I've seen this play out at so many weddings. The couple books a stunning venue, shows up on the wedding day, and we spend 15 precious minutes wandering around trying to figure out where to take portraits. That's 15 minutes you don't have — not when your family formals need 20 minutes, golden hour waits for no one, and your guests are already working through the cocktail hour appetizers.
The venues that produce the best photos aren't necessarily the most expensive or the most Instagram-famous. They're the ones where someone — the couple, the planner, or the photographer — took time to scout the space with intention.
Here's what actually happens when you don't scout: you default to the obvious spots. The ceremony arch. The front entrance. The reception table setup before guests arrive. Those photos are fine. But they're the same photos every couple at that venue gets.
When you scout, you find the staircase with the window that catches late afternoon light. The garden wall, where the ivy creates a natural frame. The kitchen doorway, where light splits across the floor, makes everything look cinematic. These are the shots that make your gallery feel like yours.
I always tell my couples to schedule a venue visit specifically for photo scouting — separate from the logistics walkthrough. Bring your phone. Take test shots at different times of day if you can. And if your photographer offers a venue walkthrough as part of their package, take it. Every single time. That one-hour investment might be the best photo decision you make for your entire wedding.
Start With the Light — Every Photographer Does
The light was the first thing I learned to see, and it's still the first thing I check at every venue. Before I look at the decor, the architecture, the ceremony spot — I look at where the light goes.
What most couples don't realize is that the same room looks completely different at 10 AM versus 4 PM. A south-facing room that's gorgeous in the morning can be completely washed out by afternoon. A north-facing room that feels dark during your daytime venue tour might fill with the softest, most beautiful directional light during golden hour.
When you're scouting, pay attention to these things:
Windows. Count them, note which direction they face, and look at how deep the light reaches into the room. Large windows on one side of a room create what photographers call directional light — it sculpts your face, adds dimension, and makes portraits look editorial. This is the light I chase at every wedding.
Time of day. Ask the venue what direction the main rooms face. South- and west-facing windows get the warmest afternoon light, while east-facing rooms are beautiful in the morning. North-facing rooms get consistent, even light all day — which is actually ideal for getting-ready photos where you need steady, flattering illumination.
Shade patterns outdoors. Look for spots with open shade — the north side of a building, under a large tree canopy, a covered porch. Direct midday sun is the enemy of every photographer. We need open shade or filtered light to avoid harsh shadows across faces and squinting in every portrait.
Light transitions. I shot a wedding at the Lake Keowee Modern Estate in South Carolina where the morning light reflected off the lake and bounced onto the bride's face through the bedroom window. It looked like a magazine shoot — completely unplanned. That reflection was only there between 8 and 9 AM. If the couple had gotten ready somewhere else in the house, we would have missed it entirely.
One more light source worth evaluating during your tour: the venue's artificial lighting. Chandeliers, string lights, and uplighting become your primary light sources once the sun goes down, and they vary wildly in quality. Warm Edison bulbs and candlelight photograph beautifully. Cool fluorescent or LED overheads — common in catering kitchens and bathrooms that double as getting-ready spaces — create a greenish cast that's difficult to correct in editing. When you're walking through the venue, flip on the lights in every room and take a phone photo. If the color looks off on your screen, it'll look off in your gallery too.
The difference between a good photo and a stunning one is almost always the light. And the difference between finding that light and missing it is almost always scouting.
The Best Indoor Photo Spots at Any Venue
After 200+ weddings, I've learned that every building has hidden gems. You just have to know what to look for.
Staircases. If your venue has a staircase — even a simple one — it's probably going to produce some of your best photos. Staircases create natural leading lines, add depth, and give elevation changes that make portraits more dynamic. A simple wooden staircase with a window at the top? That's a photographer's dream. The couple ascending, the veil trailing, the light pouring down. It writes itself.
Doorways and hallways. This sounds boring, but doorways create natural frames. A long hallway with a light source at one end produces beautiful silhouettes and moody shots. I always tell my couples to walk through doorways slowly on the wedding day — there's almost always a shot in that transition between one space and the next.
The getting-ready room. This is where you'll spend the first few hours of your day, and rental properties produce better getting-ready photos than hotels almost every time. Why? Because they're real spaces with character. A farmhouse kitchen table for laying out details. A clawfoot bathtub for a quiet portrait moment. A vintage mirror with natural wood framing. Hotel rooms all look the same. Private homes never do.
The kitchen. Seriously. I've gotten some of my favorite candid shots in kitchens — the best man sneaking a drink, the bride's mom adjusting a necklace at the counter, the flower girl stealing a cupcake off the cooling rack. Kitchens are where people naturally gather when they're nervous and excited. And where people gather naturally is where the best candids happen.
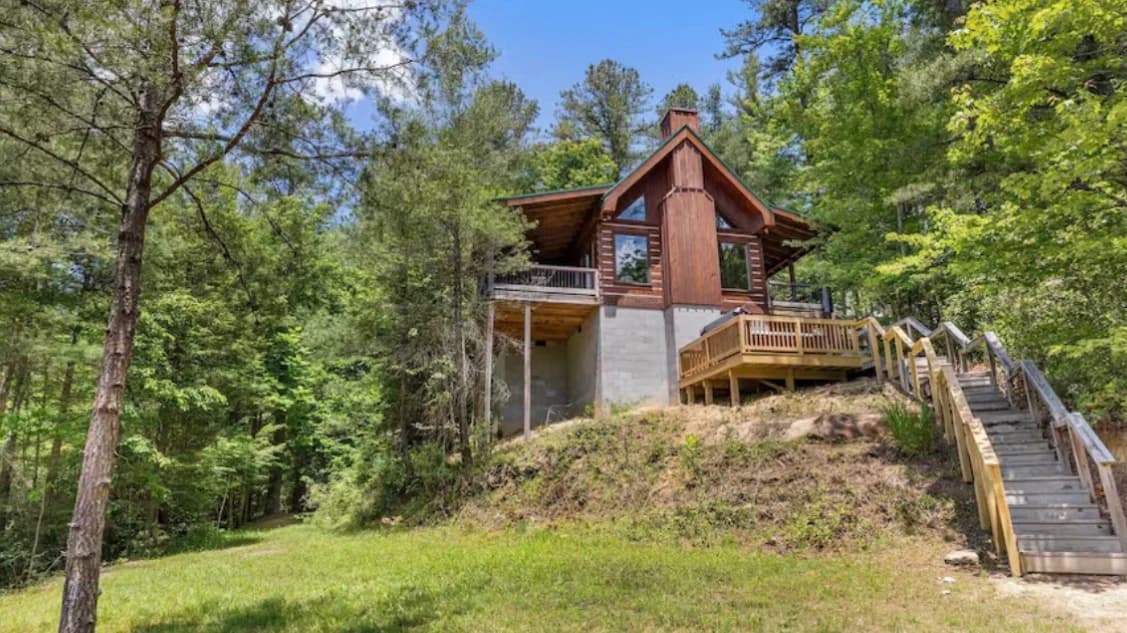
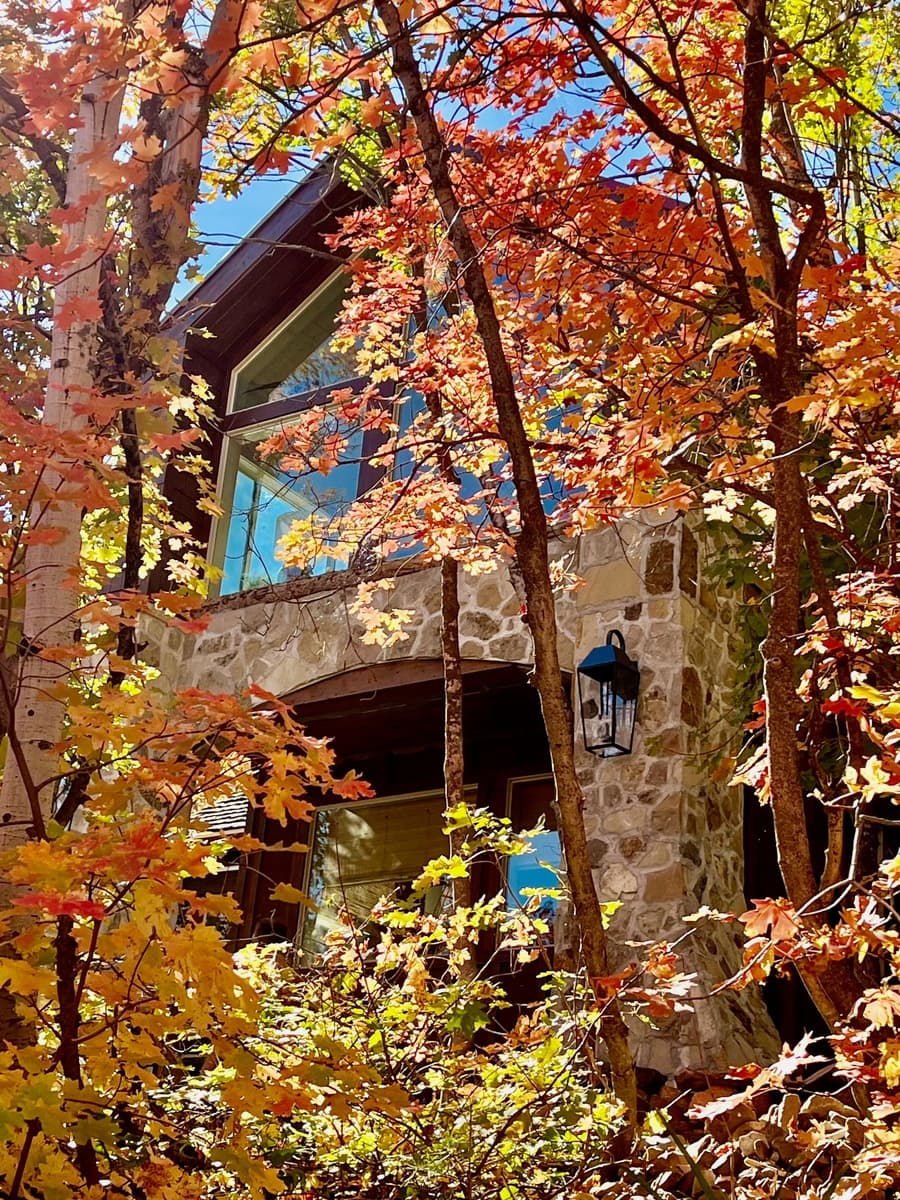
The room nobody planned for. At the Sequoia Foothills Riverfront Collection in Three Rivers, California, there's a three-story treehouse tucked into the forest canopy. Most couples would walk right past it during a venue tour. But the light filtering through those trees into that structure creates soft, dappled light that makes portraits look like fine art. Every venue has a version of this — a reading nook, a sunroom, a loft space nobody thought was part of the plan. Look for the rooms that don't seem wedding-related. Those are usually the best photo spots in the building.
While you're evaluating indoor spaces, look up. Ceiling height matters more than most couples realize. High ceilings give a photographer vertical breathing room — they're what make grand staircase shots feel epic rather than cramped, and they allow for wider compositions that include architectural detail without distorting faces. Low ceilings aren't a dealbreaker, but they do constrain angles and can make a beautiful room feel smaller on camera than it does in person. If you're choosing between two getting-ready rooms and one has significantly higher ceilings, that's often the better pick for photos.
Trust me on this one: the "boring" spaces often photograph better than the grand ones. A simple white wall with one perfect window will beat a decorated ballroom for portraits every time. That's the single biggest mindset shift you can make going into your venue scout.
Outdoor Wedding Photo Locations You're Probably Missing
Most couples identify one outdoor photo spot during their venue tour: wherever the ceremony happens. And yes, your ceremony backdrop will produce beautiful photos. But it's usually not the most interesting location on the property.
Here's what I look for when I walk a venue's outdoor spaces:
Tree lines and edges. The edge where a manicured lawn meets a tree line is almost always a strong photo location. You get the clean foreground of the grass and the textured depth of the trees behind you. If the tree line faces west, you get golden hour light filtering through the branches — that warm, glowy backlight that makes everyone look incredible.
Water features. Lakes, rivers, ponds, pools — any body of water adds a dimension to photos that nothing else can replicate. Water catches light. It creates reflections. It adds a sense of place that grounds the image. I shot at a 35-acre estate near Lake Lanier in Georgia where the dock extended over the water, and couple portraits on that dock at sunset, with the lake reflecting the sky behind them — you simply can't manufacture that kind of depth. It happens or it doesn't, and it only happens if you know the spot exists.
Paths and walkways. Walking shots are some of the most natural-looking photos you can get, and they're a cornerstone of the editorial candid style that 68% of couples are requesting in 2026. Any path — gravel, stone, grass, a wooden boardwalk — gives movement and direction. The couple walks toward you, away from you, or parallel. Each angle tells a different story.
Structures. Pergolas, gates, arches, fences, stone walls. These create frames within the frame. A couple standing in an open gateway with vines growing over the top — that's the kind of layered composition that elevates a photo from snapshot to portrait.
Elevation changes. Hills, terraces, balconies, rooftops. Any time you can get above or below your subject, the photo becomes more interesting. A slight hill overlooking a valley gives you a portrait with a sweeping background that feels epic without anyone having to try.
A note on seasons. The venue you tour in April looks nothing like the venue you'll get married in October — and both look nothing like December. Foliage, bloom cycles, bare branches, overgrown paths, and muddy ground after a wet spring all affect which outdoor photo locations actually work on your wedding day. If your wedding is more than a few months away, ask your venue coordinator for photos from the same time of year, or look through past couples' galleries from that season. The tree-lined path that's gorgeous in fall with golden leaves may be a wall of bare sticks in February — or a tunnel of full green canopy in July. Knowing what to expect lets you and your photographer plan for the real version of the space, not the version you toured.
Overcast days. Before we get to full rain: don't overlook what an overcast day actually does for photography. A solid cloud cover acts like a giant natural softbox — it diffuses harsh sunlight, eliminates the squinting and hard shadows that plague midday portraits, and creates even, flattering light across skin tones. Some of the most technically clean portrait galleries I've delivered came from grey-sky days where the couple was convinced the weather had ruined everything. If your forecast shows clouds but no rain, tell your photographer. They'll likely be quietly relieved.
The key is to walk the entire property, not just the event spaces. Some of my most-liked portfolio images came from spots that were technically "between" locations — a gravel path between the parking area and the ceremony site, a side garden that wasn't part of the official venue layout.
Hidden Photo Spots That Make Galleries Special
Here's what actually happens at most weddings: the photographer gets 30 minutes for portraits, shoots at two or three obvious locations, and moves on to the reception. The gallery looks good. But it doesn't surprise anyone.
The surprise comes from hidden spots. And finding those is what separates a good gallery from one that makes you cry when you see it for the first time.
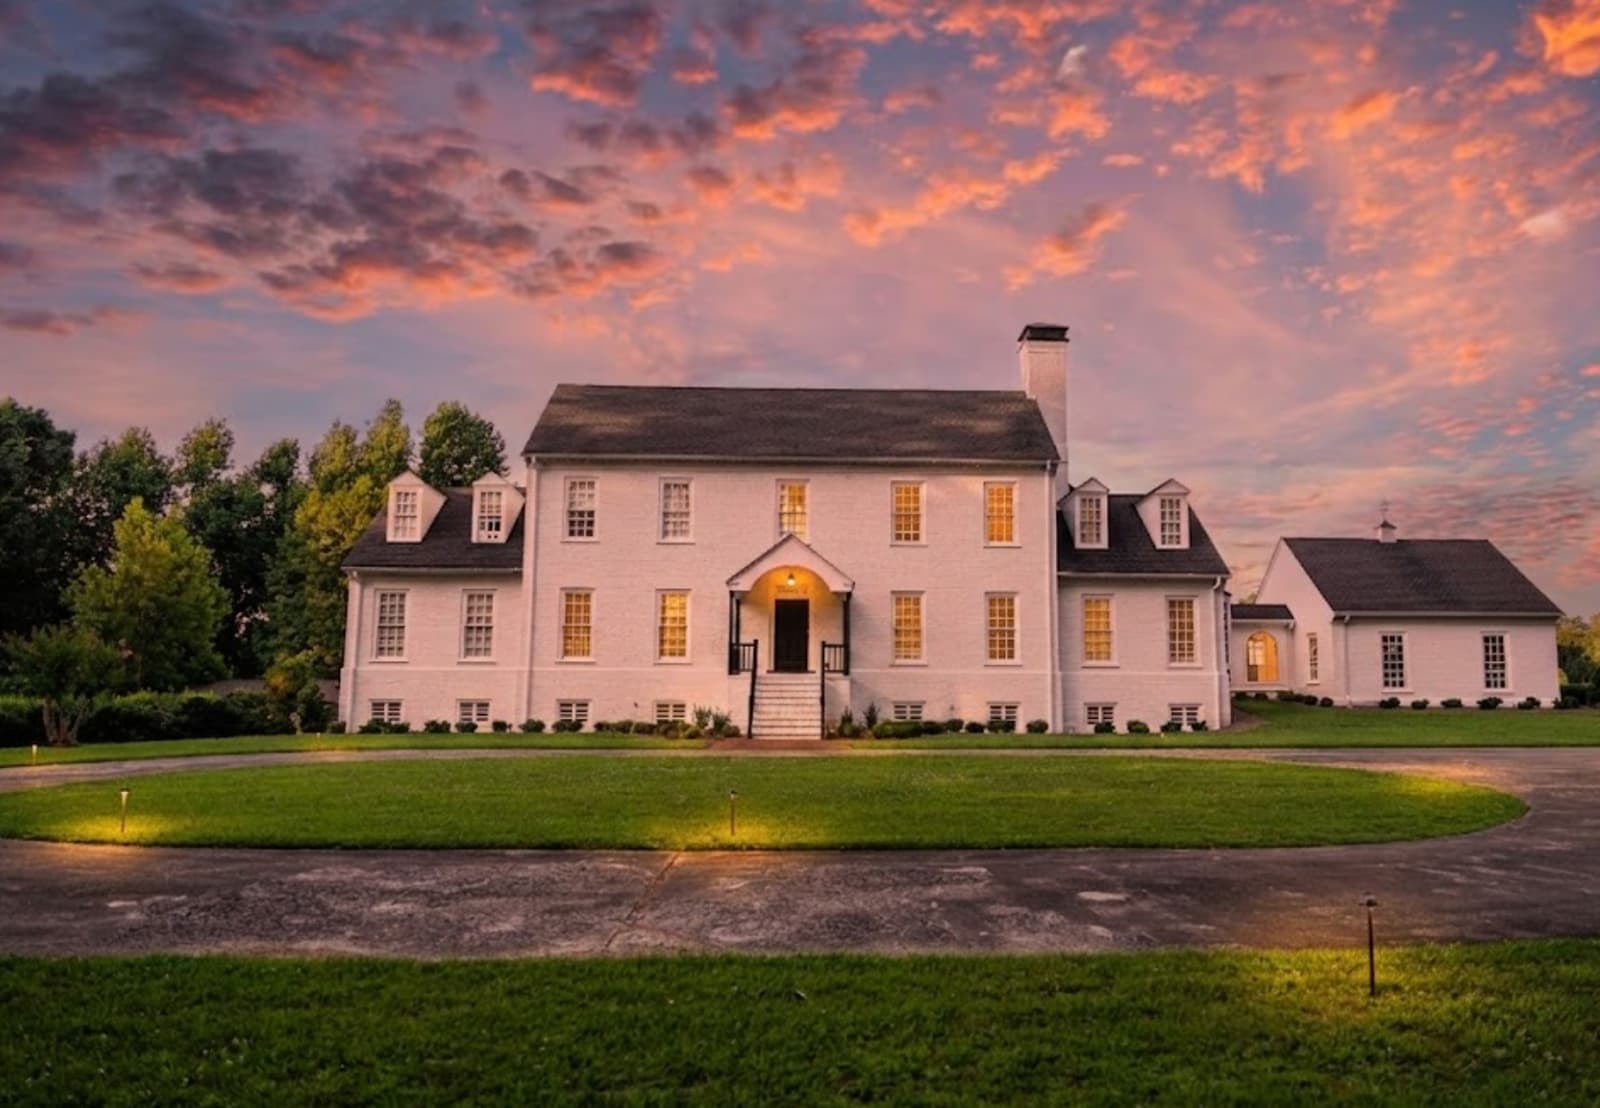
Back porches and side entrances. The front of the venue is where everyone gathers. The back is where the quiet moments live. I photographed a December estate wedding where the couple stepped onto a string-lit wraparound porch barefoot after the last dance. I got that shot. It became the photo that hangs in their living room — not the ceremony, not the portraits, but that unplanned moment on the back porch.
The in-between spaces. The walk from the getting-ready room to the ceremony. The moment between the ceremony and the reception when the couple has five minutes alone. These transitions are where real emotion lives, and they need a beautiful backdrop just as much as the formal portraits do. Scout the connecting spaces, the pathways, the stairwells between floors.
Details you can move. Not every photo spot has to be used as-is. A vintage chair placed by a window. A veil draped over a wrought-iron railing. Your invitation suite arranged on a stone ledge with morning light crossing it. The detail that made it was almost always the photographer who thought about the context as much as the object.
Mirrors, glass, and reflections. Floor-to-ceiling mirrors double your composition. Glass doors create ghostly double exposures when the light hits right. Puddles after rain become perfect reflection pools. I'm always looking for reflective surfaces because they add layers to an otherwise flat image — and they're everywhere if you train yourself to notice them.
The high vantage point. If the venue allows access and it's safe, a balcony, a second-floor window, or a rooftop can produce one epic wide shot of the entire event space with the couple in the center. Not every venue has this. But when it does, it's worth asking about during your walkthrough.
Your Rain Plan Needs Photo Spots Too
Every outdoor wedding needs a rain plan. Most couples think about where the ceremony moves. Almost nobody thinks about where the photos move.
Here's what I've learned from every rainy wedding I've shot: rain doesn't ruin photos. Bad planning ruins rainy-day photos.
When you're scouting, identify at least three covered or indoor spots that could work for portraits if the sky opens up. These should be different from your getting-ready and reception spaces — you want variety in your gallery, not the same room repeated in 200 frames.
Look for:
Covered porches. A deep porch overhang with rain falling behind the couple in the background? That's not a backup plan. That's a feature. Some of my most dramatic portraits have come from exactly this setup — the warmth and shelter of the porch against the moody atmosphere of the rain.
Barn interiors and character spaces. I had a rainy wedding in Hill Country where we used the barn interior lighting and it turned out better than any outdoor ceremony shot I could have gotten that day. The warm wood walls, the string lights, the soft shadows — the rain pushed us indoors and the photos were genuinely better for it. That's a lesson I carry to every venue walkthrough.
Large windows with views. If it's raining, frame the couple by a window looking out at the storm. The moodiness works. Water on the glass creates texture. You get the indoor warmth and the outdoor atmosphere in a single shot.
Glass doors. Similar to windows, but you can open them. The couple standing in an open doorway with rain falling behind them creates a natural frame with atmospheric depth that clear skies literally cannot provide.
The point is simple: decide where your rain photos happen before it rains. Don't make your photographer improvise on what's already a high-stress day.
How to Match Your Photo Timeline to Your Venue's Light
Every venue has a golden window — a period when the light is perfect for portraits. The trick is knowing when it happens at yours.
For most venues, golden hour light (60 to 90 minutes before sunset) is the prime window. But every property catches it differently. A venue surrounded by tall trees might lose direct sunlight 30 minutes before a property on open land does. A mountain property might get gorgeous golden light on one side of the building while the other side sits in deep shadow.
Here's what I'd do:
Check sunset time for your wedding date. Then work backward. If sunset is at 7:30 PM, your best portrait light starts around 6:00 PM. Build your timeline around that window, because everything else — cocktail hour, dinner start, toasts — can shift (just be sure to let your caterer know ASAP). The light cannot.
Visit the venue at the same time of year. If your wedding is in October and you visited in March, the light will be completely different. Sun angle, intensity, and direction all change with the seasons. Even a 30-minute FaceTime call with the venue coordinator during golden hour on a similar date can tell you a lot about what to expect.
Note where shadows fall. If your ceremony faces east and your wedding is in the afternoon, the ceremony spot might be in full shade by the time you exchange vows. That's not a disaster — shade can be gorgeous for ceremony photos. But you should know it in advance so your photographer can plan accordingly.
Talk to your photographer early. Share your venue details, your timeline, and ask where they'd want to shoot portraits. A good photographer will look at your venue's orientation, the time of year, and the time of day, and tell you exactly when and where the light will be best. That conversation alone can save you from scheduling couples portraits at 2 PM in direct overhead sun — which, trust me on this one, is nobody's best look.
Estate venues and rental properties have a huge advantage here. Everything happens in one place. When golden hour arrives, you're not driving 20 minutes to a separate photo location. You're walking 30 seconds to the garden, the porch, or the back lawn. That proximity is the reason estate venues save 30 to 45 minutes compared to multi-location weddings, and why so many of my best golden hour galleries come from private properties.
What Your Photographer Needs From You Before the Wedding
Most photographers include a venue scouting visit or a walkthrough conversation as part of their package. But the quality of that conversation depends entirely on what you share in advance.
Here's what to send your photographer at least two weeks before the wedding:
A venue map or floor plan. Even a rough sketch helps. Mark the ceremony spot, the reception area, the getting-ready rooms, and any outdoor spaces you noticed during your tour.
Photos from your venue visit. Snap photos of rooms, windows, outdoor areas — especially anything that caught your eye. "I loved this corner" gives your photographer something specific to work with instead of starting from scratch.
Your venue's orientation. Which direction does the front of the building face? This single detail tells a photographer almost everything they need to know about where the light will be at different times of day.
Your getting-ready room assignment. Which room will you actually be in? If you have a choice between rooms, your photographer may have a strong opinion about which one photographs best. Ask them before you decide.
Access notes. Are there areas that are off-limits? Is the garden accessible all day or only before ceremony setup begins? Can you walk on that pretty stone bridge? These logistics matter more than you'd think — nothing kills a portrait moment like discovering the spot is roped off.
Your photo priority list. Tell your photographer which photos matter most to you. If sunset portraits are your number one priority, they'll build the entire timeline around that window. If you care most about candid reception moments, they'll plan coverage differently. That clarity changes everything about how a photographer approaches your day.
Vendor team context. Finally, share your vendor team. Let your photographer know who your day-of coordinator is and how to reach them — coordinators control access to spaces, manage room-clear timing for portrait setups, and are often the person who can unlock a gate or hold a garden spot open for an extra fifteen minutes. If you're also working with a videographer, introduce them to your photographer in advance. Two cameras covering the same moments need a plan, and that conversation goes much smoother when it happens before the wedding day rather than in the parking lot at 9 AM.
The more your photographer knows about the space in advance, the less time they spend figuring it out on the wedding day — and the more time they spend actually shooting the moments that matter.
The Five-Minute Venue Photo Scouting Checklist
You don't need to become a photographer to scout your venue well. Just bring this checklist on your next visit and let it guide your eyes to the spots that will actually matter on your wedding day.
Light Check:
- Which rooms have the biggest windows?
- What direction do the main windows face?
- Where does natural light reach deepest into the building?
- Where is the open shade outdoors?
- Are there highly reflective outdoor surfaces — white concrete, pale gravel, light-colored stone walls — that could create harsh bounce light in direct sun?
Indoor Spots:
- Any staircases with natural light?
- Long hallways or dramatic doorways?
- Character rooms with unique details — fireplaces, built-in shelving, vintage features?
- Which room feels best for getting ready?
Outdoor Spots:
- Where does the ceremony backdrop look strongest?
- Any tree lines, water features, or elevation changes worth noting?
- Walking paths, stone walls, or interesting structures?
- Hidden spots between the main event areas?
Rain Plan:
- At least three covered spots that could work for portraits?
- Large windows or glass doors for rainy-day framing?
- An indoor space with good light that isn't the reception room?
Timing:
- What time is sunset on your wedding date?
- Where will golden hour light hit the property?
- Any tall trees or buildings that block late afternoon light?
To Share With Your Photographer:
- Photos of every room and outdoor space from your tour
- Building orientation — which direction does the front face?
- Any access restrictions or off-limits areas
- Your top three photo priorities for the day
The couples who send me this kind of information before the wedding consistently end up with 800+ stunning images and a gallery that feels intentional from the first frame to the last. The venue didn't change between their day and the last couple who got married there. The preparation did. And from behind my camera, I promise you — I can always tell the difference.
Free Tools to Build Your Vendor Team
Finding the right vendors for a private property wedding takes specialized expertise. WedStay makes it simple.
🎯 Start PlanningBrowse Vetted Vendors — Only 15% of applicants accepted. 500+ vetted professionals across photographers, planners, caterers, and 8 more categories.Wedding Budget Planner — See exactly how much to allocate per vendor category based on your location and guest count.Wedding Venue Cost Calculator — Includes vendor add-on pricing for catering, DJ, flowers, hair & makeup, and more by region.
Sources
1. Real Weddings, Real Wedding Photos — brides.com
2. 45 Questions to Ask a Wedding Venue During Your Tour — theknot.com
3. Wedding Inspiration from Real Weddings in Vogue — theknot.com
4. The Etiquette of Wedding Rehearsal Dinners — marthastewart.com